One of the newer miniature games to hit the scene is Trench Crusade and like everyone else, I’m curious. Disclaimer: This is not a deep dive into minis or rules. I know minimum to nothing about them. My interest in TC lies in the terrain and 1 free mini I got from NOVA Open. After over a year of thinking about building a terrain board, I am finally starting one!
Future friend of the site, Joe (he doesn’t know I’m writing this), expressed interest in a terrain board aaaaannnnd I kind of took off running. This is part 1 of many articles…. Without knowing anything about TC, and still not knowing much, let’s get started!
Planning Phase
Even though this board isn’t for me, my ideal board would be modular with the goal of multiple configurations to keep games fresh. To make digesting this easy, let’s call the 3ft x 3ft or 4ft x 4ft finished product the “board”. This is divided into 12in x 12in squares called “tiles”.
I took some square pieces of paper to represent the tiles and drew out some concepts. The idea is that each trench opening is in the middle of each side and is 4in wide. These early iterations had more straight edges and wide areas. Those were nixed in favor of more confined spaces. The photo on the right shows some possible places for various pieces of larger terrain. When designing the trenches, I wanted to make sure there was still some open area for people to run from one trench section to the next and large enough to have some pieces of terrain. Think barbed wire, bunkers, artillery or crosses.
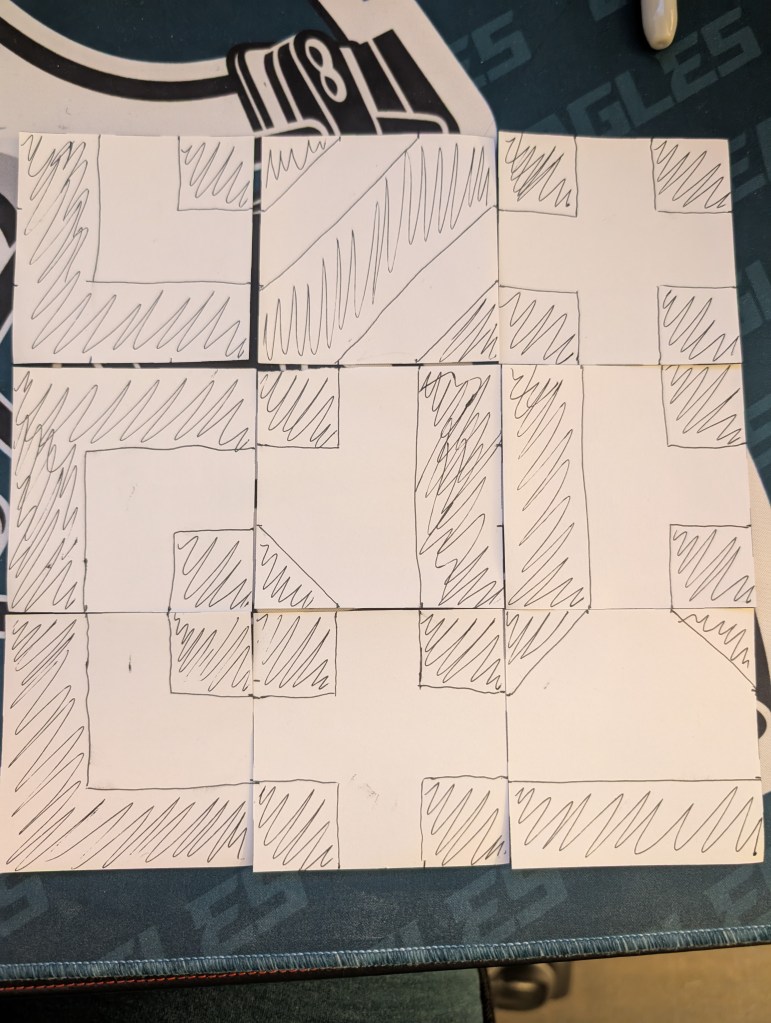

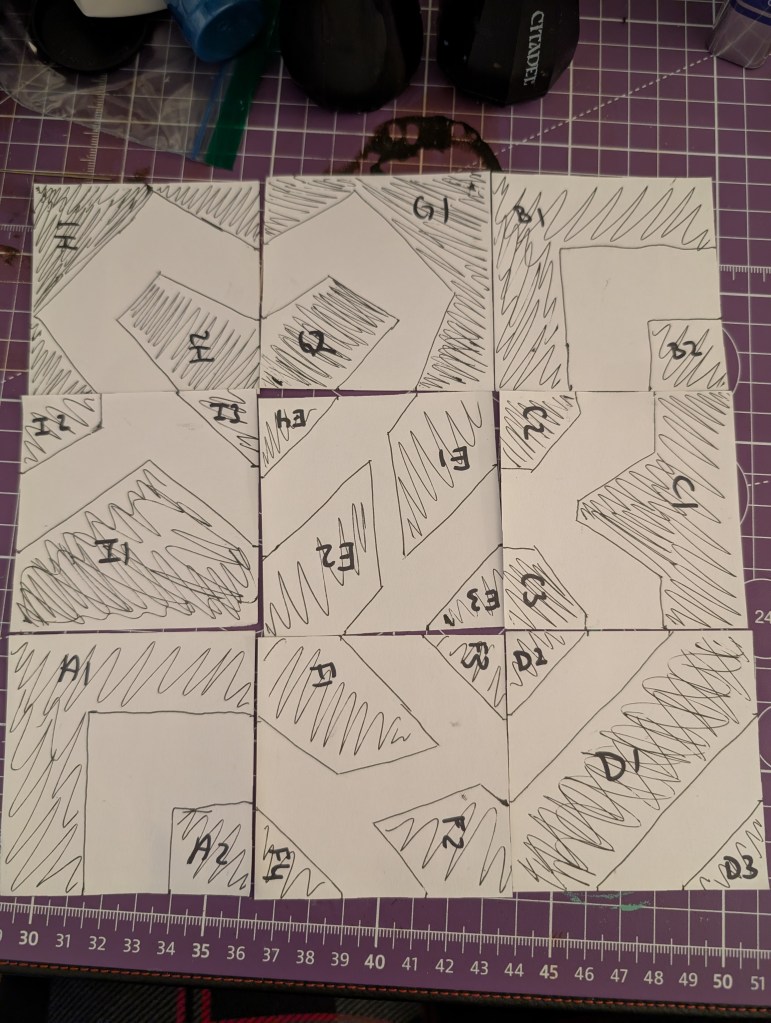
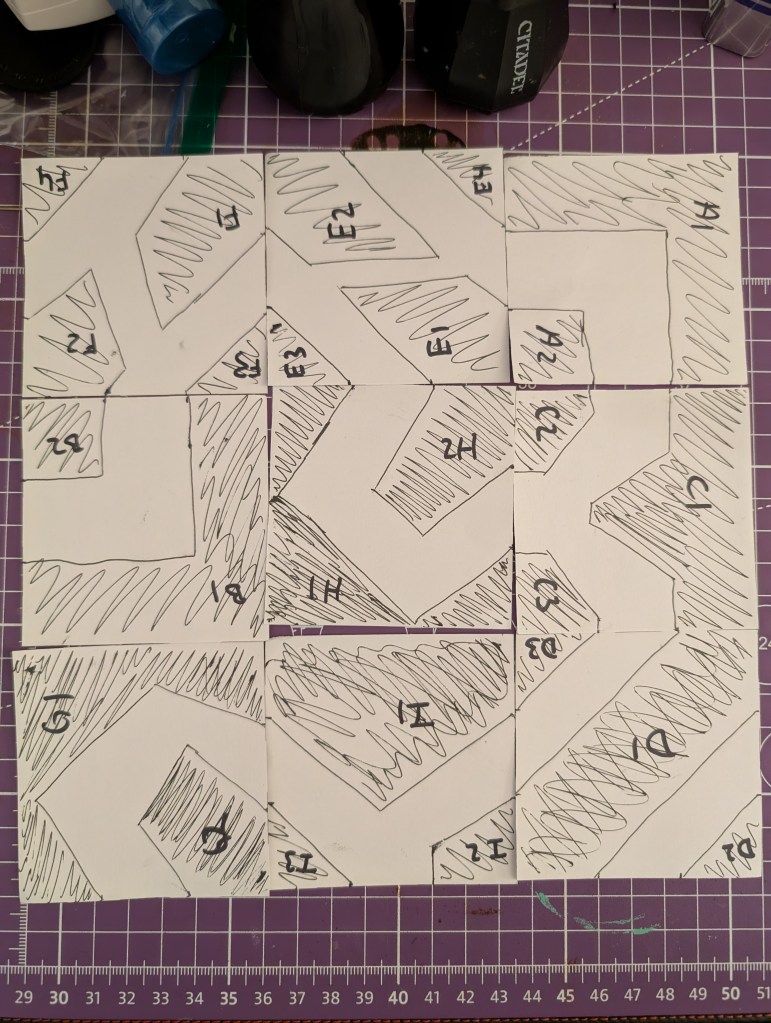
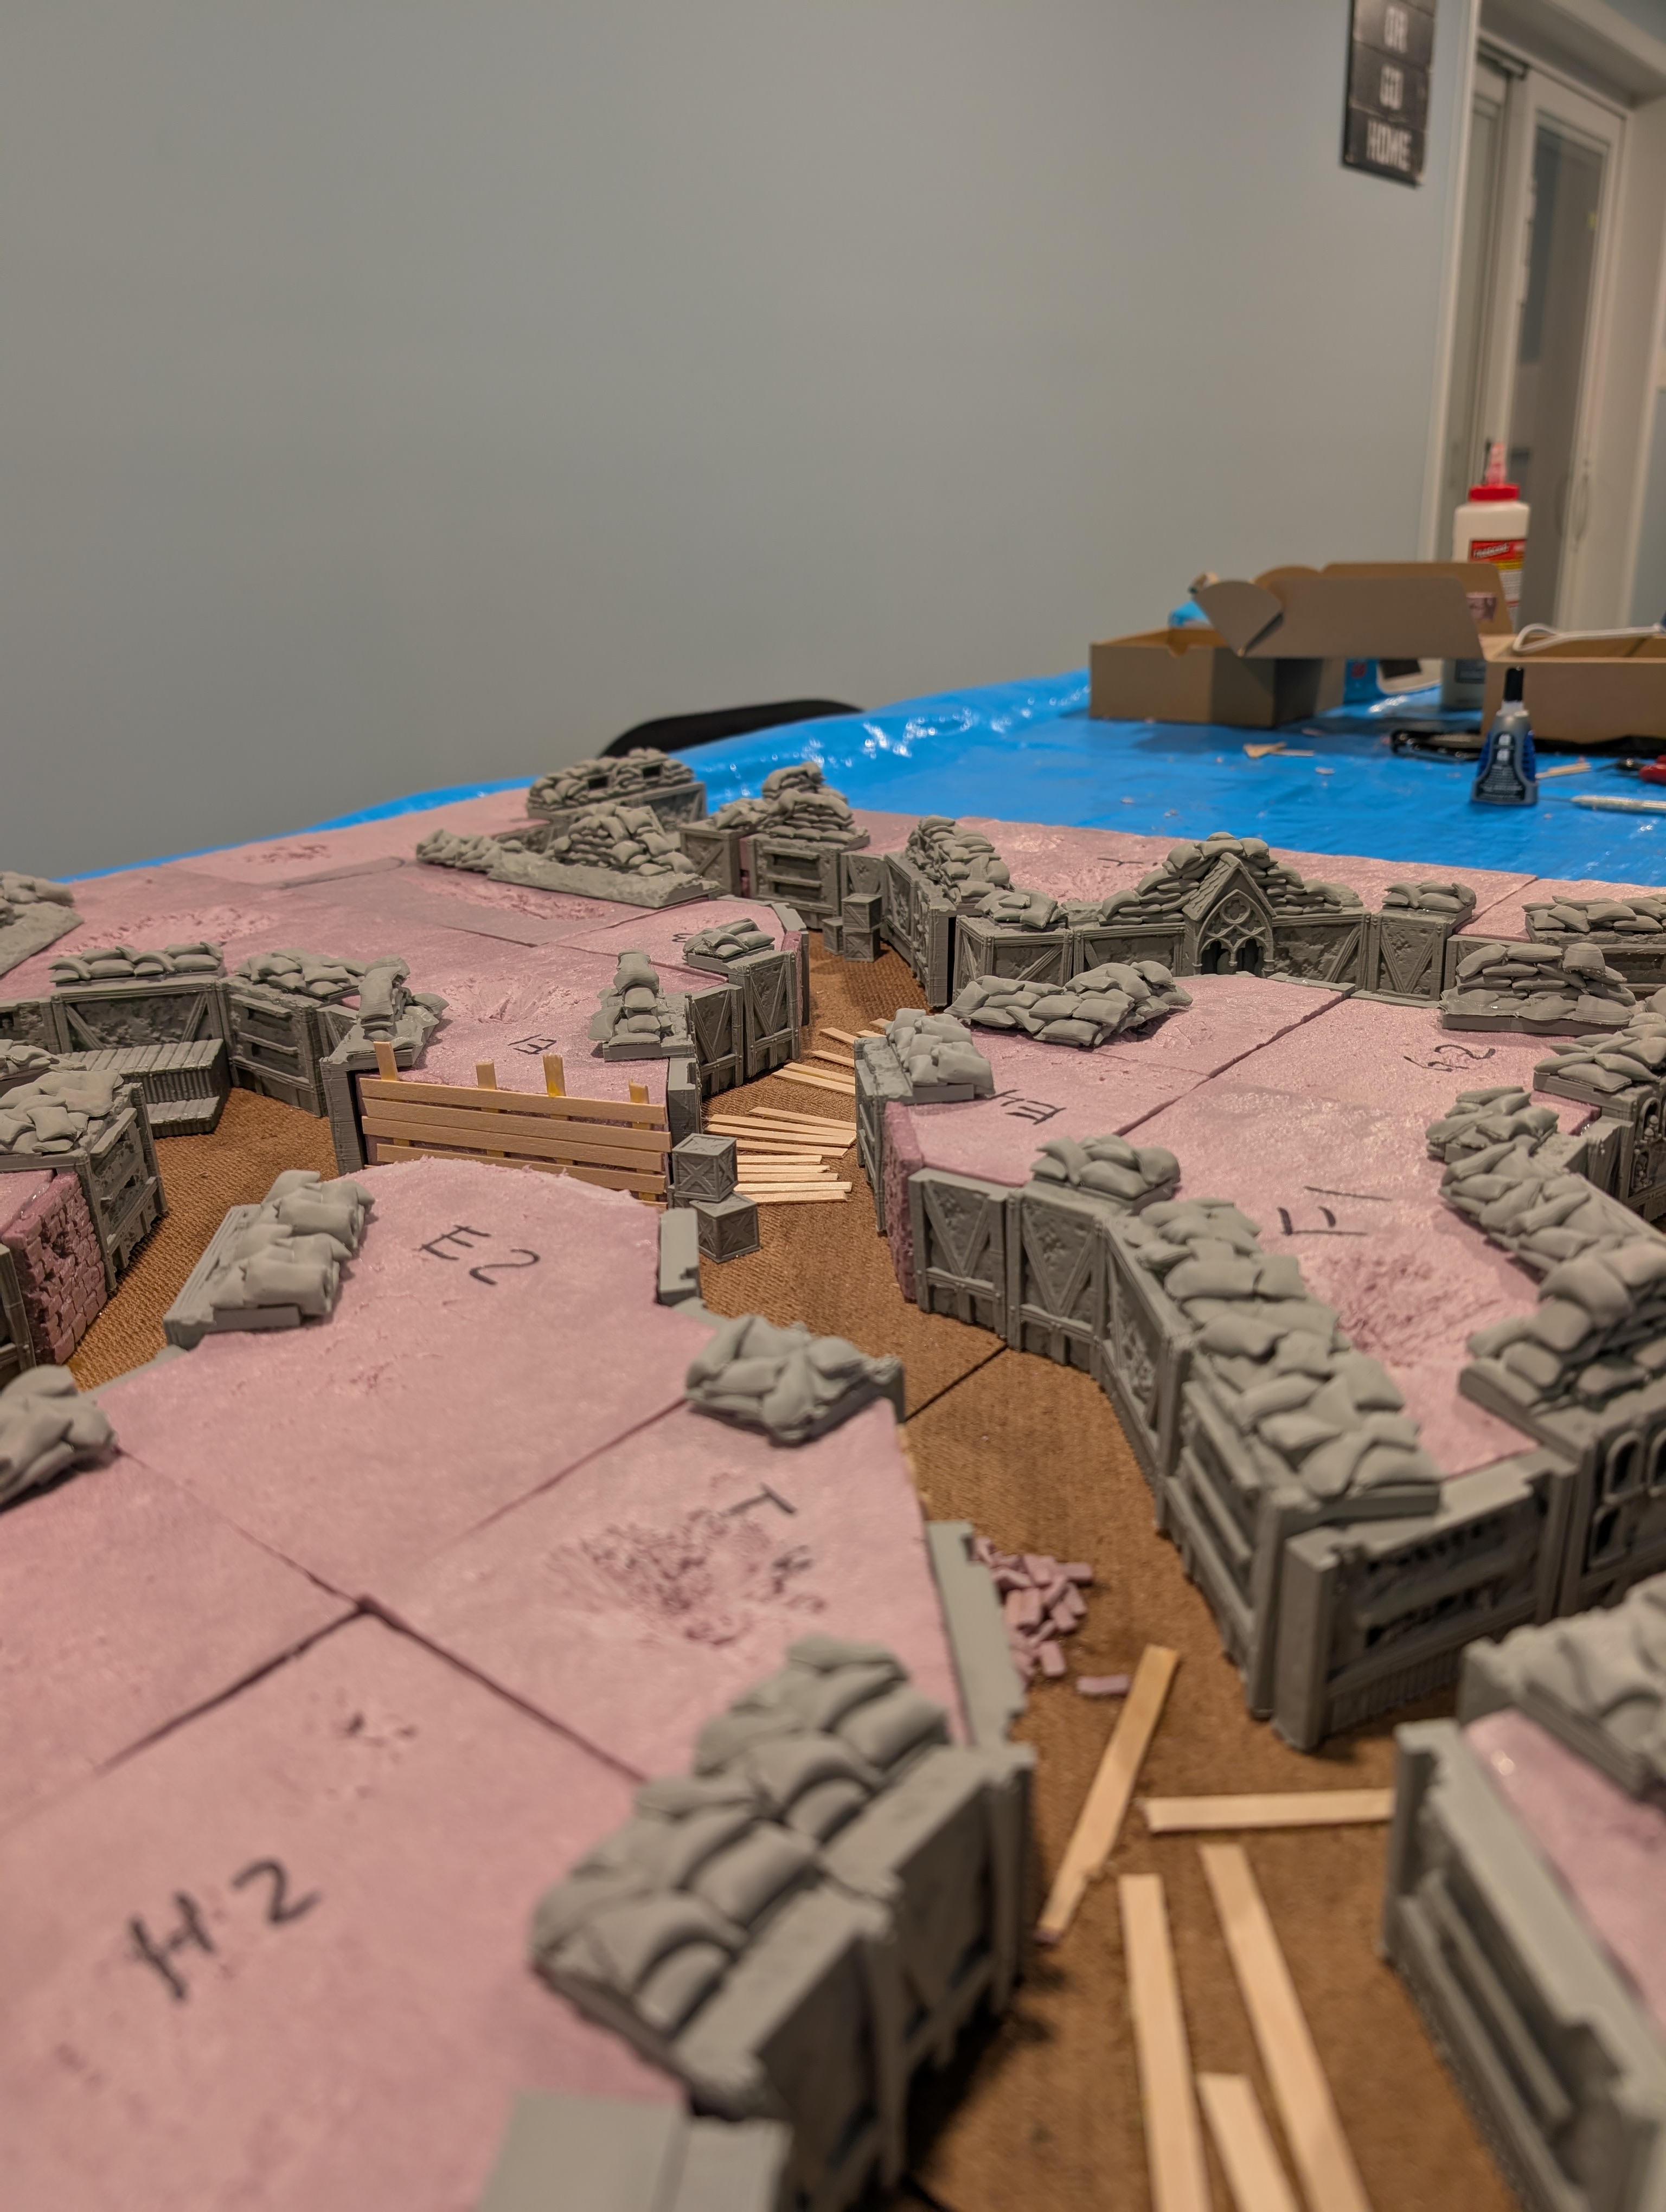
Here’s what we ended up with. Ignore the letters and numbers for now, we’ll talk about those later. The final version of the drawings has more angles and narrow passages. This was intended to make things look less organized and planned while being “dug”.

After these initial drawings, I ended up adding 3 “No Man’s Land” tiles. No trenches, just an open area with craters and uneven ground.
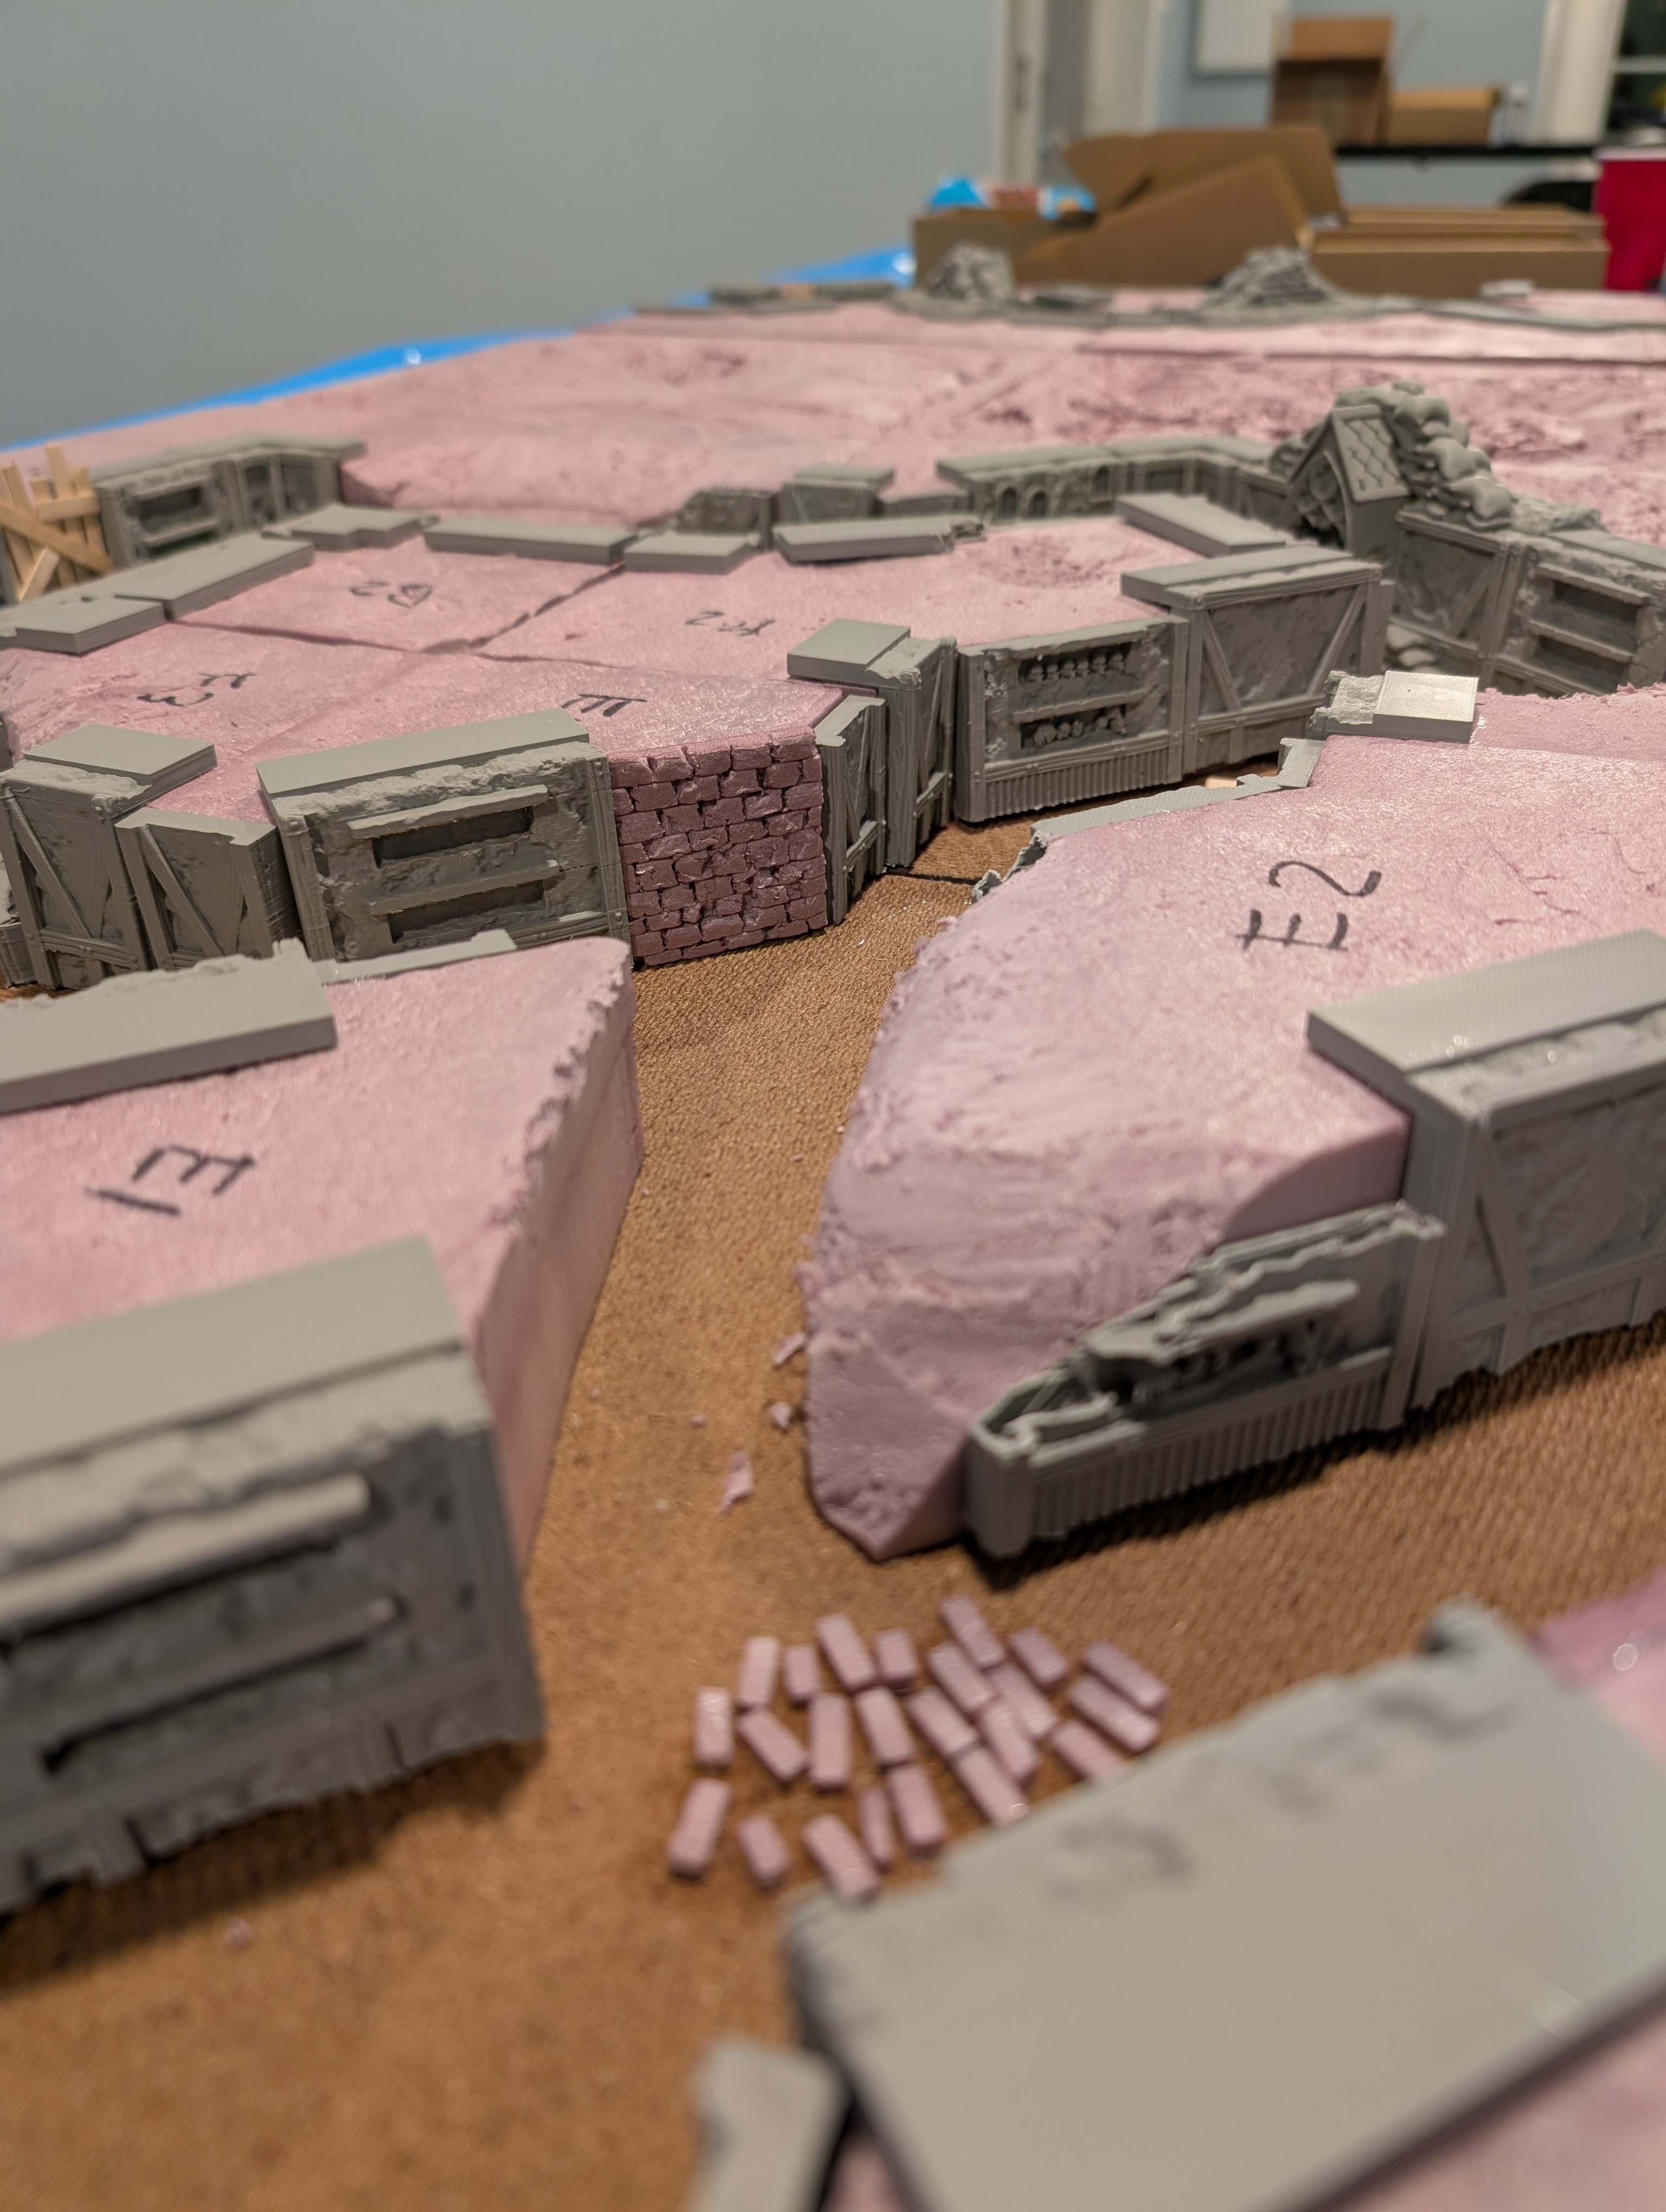
Now for the Trench walls. We decided to use the official terrain STLs provided. I had a general idea which pieces I wanted to use, but not quantity. Time to fire up the Bambu P1S! I loaded the plate with the same wall piece and let it rip. Breaking the supports off was a pain, but something I can easily do while watching TV so it went quick.
Supplies
Since I’m still working on this project, this list might grow and change. Most of these items are from Home Depot or Amazon. I’ll go into some of these in a little more detail, others are pretty straight forward.
- 8ft x 4ft Pink XPS Foam. 1in thick
- Cut to 12 in squares via a hot foam wire cutter
- Unfortunately, it wouldn’t fit in the car at Home Depot. We did some quick dirty cutting in the parking lot so some pieces are uneven…
- 8ft x 4ft MDF Hardboard. 1/8in thick
- Home Depot cut this for me at no charge. Though I think they were supposed to charge me…
- These cuts are also uneven but not as bad as I thought it would be.
- In hindsight, I would probably get a thicker hardboard so there would be less concerns about warping.
- 1 gallon Titebond Glue
- Probably overkill to get this much but we’ll see how much we end up using.
- Gorilla Clear Glue
- Glue the XPS Foam together. Could forgo this and use the Hot Glue Gun.
- Hot Glue Gun & Sticks
- Glue the trench pieces to the foam. Dries faster than Gorilla Clear Glue
- Borrowing this from a friend and didn’t have it during the earlier stages of building and gluing.
- Super Glue
- For magnets
- 6x3mm Magnets
- Connect the tiles together and for the Iron Shavings…
- Iron Shavings
- Inspired by RP Archives Magnet Dirt
- This would be for the top of the tiles, not in the trenches, to hold some of the scatter terrain pieces in place so they wouldn’t fall over if the table gets bumped.
- More on this in Part 2.
- Liquitex Burnt Umber Acrylic Paint
- Dirt is brown
- FW Burnt Umber Ink
- Washes are expensive so we’ll be trying to make our own.
- Liquitex Gloss Medium
- Part of our homemade wash mix
- Brown Tile Grout
- Main ingredient of our dirt mix
- Coffee Grounds
- Another main ingredient of our dirt mix
- Coffee Stirrers
- Wood planks for flooring and walls in the trench
- Paper Bowls
- Vessel to mix dirt in
- Isopropyl Alcohol (IPA)
- Thinning paint and Wood glue for dirt mix
- Water
- Thinning paint and Wood glue for dirt mix
- Tarp
- Keep my table clean
- Gloves
- Keep my hands clean
- Respirator
- Keep my lungs clean
- Old makeup brushes
- For quicker dry brushing since we’ll have a lot of ground to cover. Get it 🥁
- Various acrylic paints
- For painting….duh
- Airbrush
- For quicker base coats
Getting Started
After a trip to Home Depot, it was time to cut the foam. It is possible to do this without a hot wire foam cutter. I would not recommend it. After having to cut the 8ft x 4ft sheet in the Home Depot parking lot, I would avoid cutting this by hand at all costs. It is tedious and leaves a lot of room for error. Cutting an 8ft x 4ft board left us with thirty-two 12in squares.
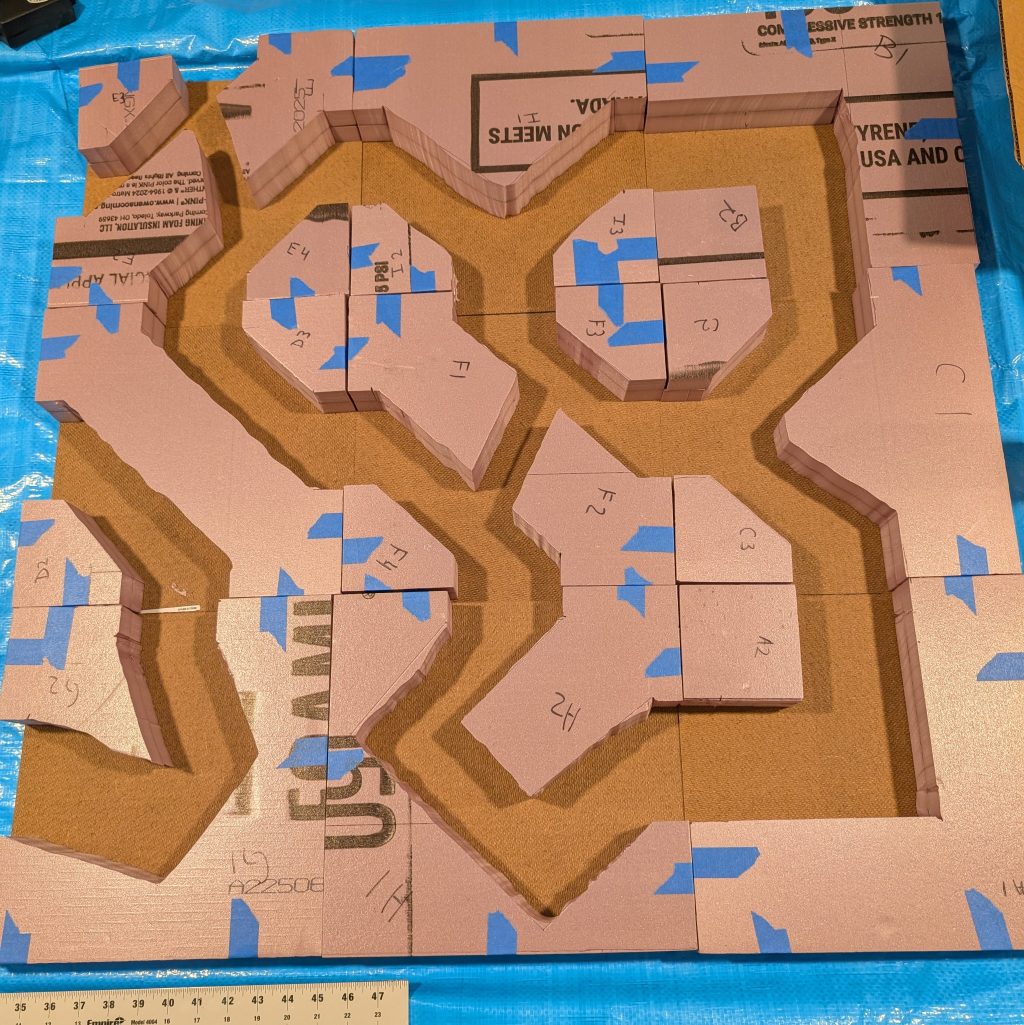
So what are these trenches going to look like? Good thing we have some drawings. I used a sharpie to draw out the shapes onto the foam, labeling them A to I in case I needed to look at them as references later. Then each piece on that tile was numbered 1 to 4.
I wasn’t sure how glue would react or cut with the hot wire foam cutter so I used painters tape to hold the pieces together while cutting the trench shapes. Each tile has 4in entrances and each entrance is centered, so 4in of foam on the left and right side of each entrance. Each tile entrance has 1in entry so all the entrances will sit flush. I probably didn’t need to this for future boards, but it felt right at the time.


Next came gluing the pieces together to get 2in thick foam. I used some extra books to help apply pressure, I would HIGHLY recommend spending the money on clamps. Some of the foam shifted while drying so the top and bottom layers did not line up flush.
Once those were dry, I cut the 2in thickness down to 40mm. You might be wondering, why did you cut the foam into smaller pieces, glue it, then thin it? The hot foam wire cutter I used is fine, it was only $90. However, the arm isn’t 12in tall. So the 12in squares I had cut would not fit under the arm to thin the whole piece at once. If I ever need to replace the hot wire foam cutter, I will get a better one. Probably a Proxxon. Measuring the guide bar and making sure it was straight was a pain. It took many test pieces to make sure the foam would be 40mm. Then it took a long time to thin each piece.
Next up was gluing the XPS foam to the MDF. Another reason to get clamps… Nothing really to note here. The MDF had a finished and unfinished side. I opted to put the finished side on the bottom so it would be touching the tabletop. We’ll see if I regret that.
Ground Features
Wasn’t really sure what to call this section….felt weird to call it holes? Craters? Anyway, before putting trench walls on, I wanted to have some craters and caved in sections of wall. The intent is to give it a “we’ve been through it” or “been here for years” vibe. This was messy work, XPS foam was everywhere. I took a knife and started hacking and carving out sections. Since the board is modular and tiles can be rotated every way, I wasn’t concerned about making sure everything was flowing or had impact damage in the same direction. Just wanted to make it look well used.
I also got to work on the No Man’s Land tiles. This was done well after the original “ground features”. We’ve got one large crater, a swampy/muddy area and a section with smaller craters.

Trenches
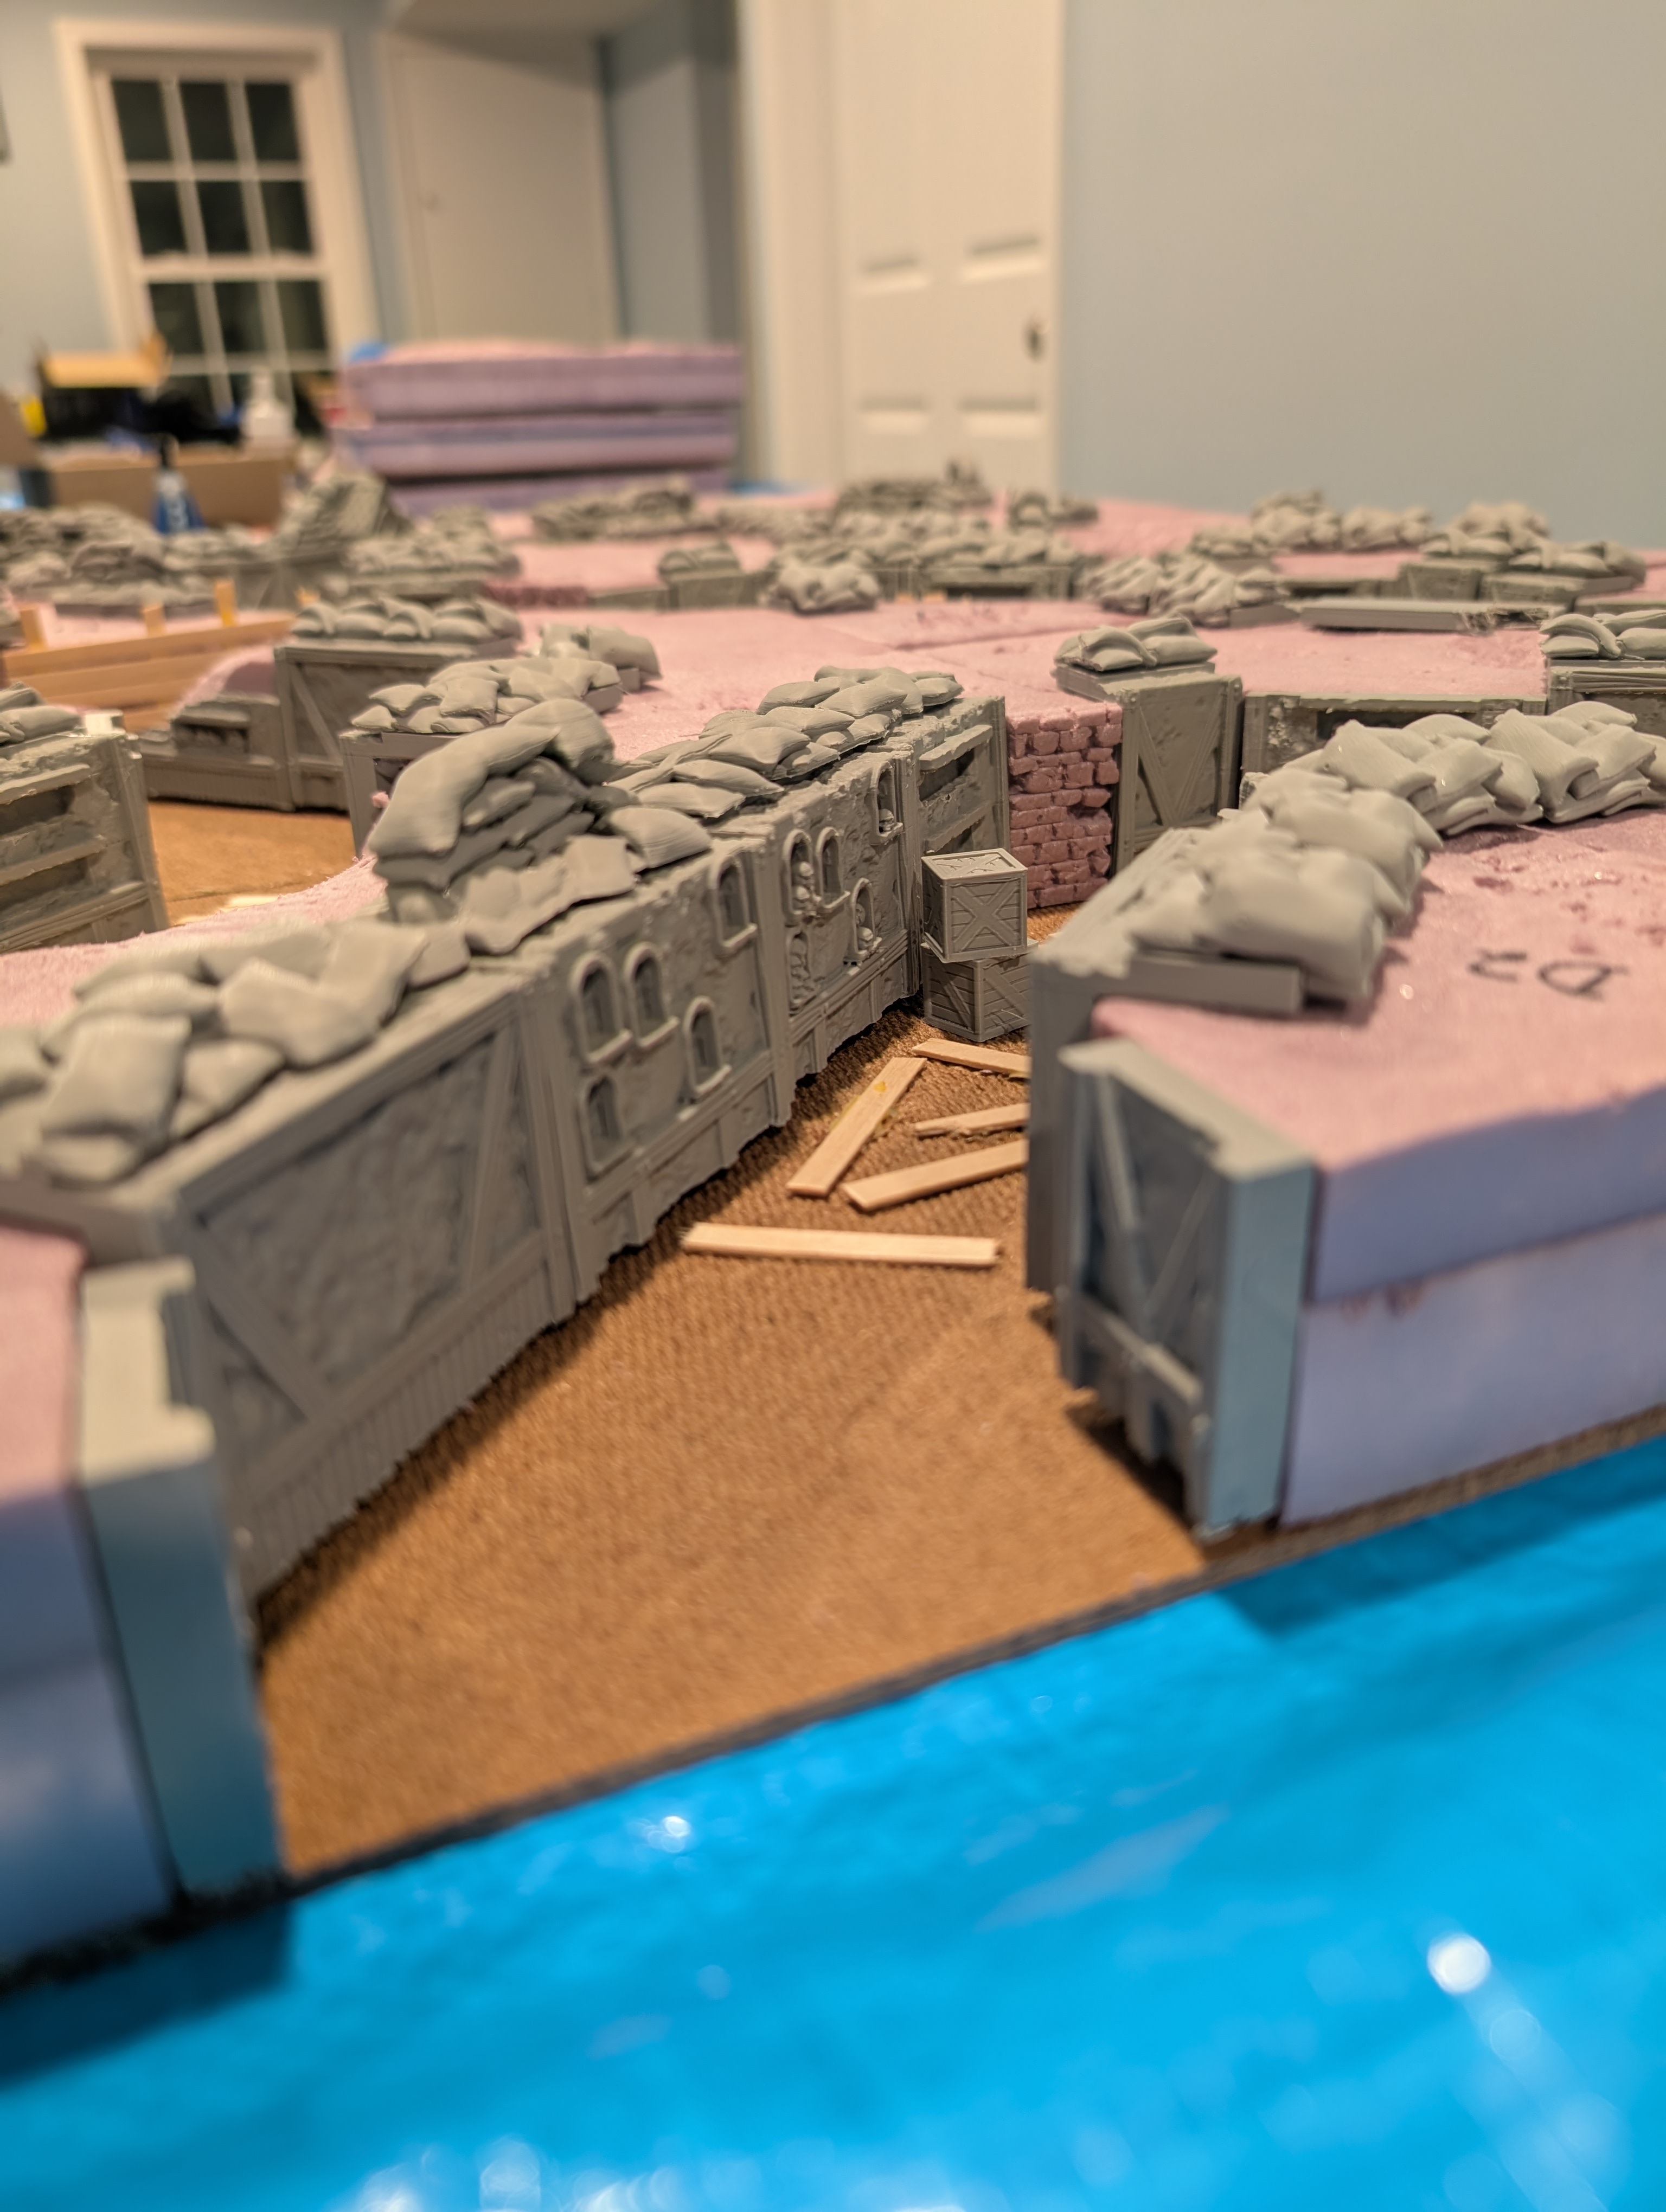
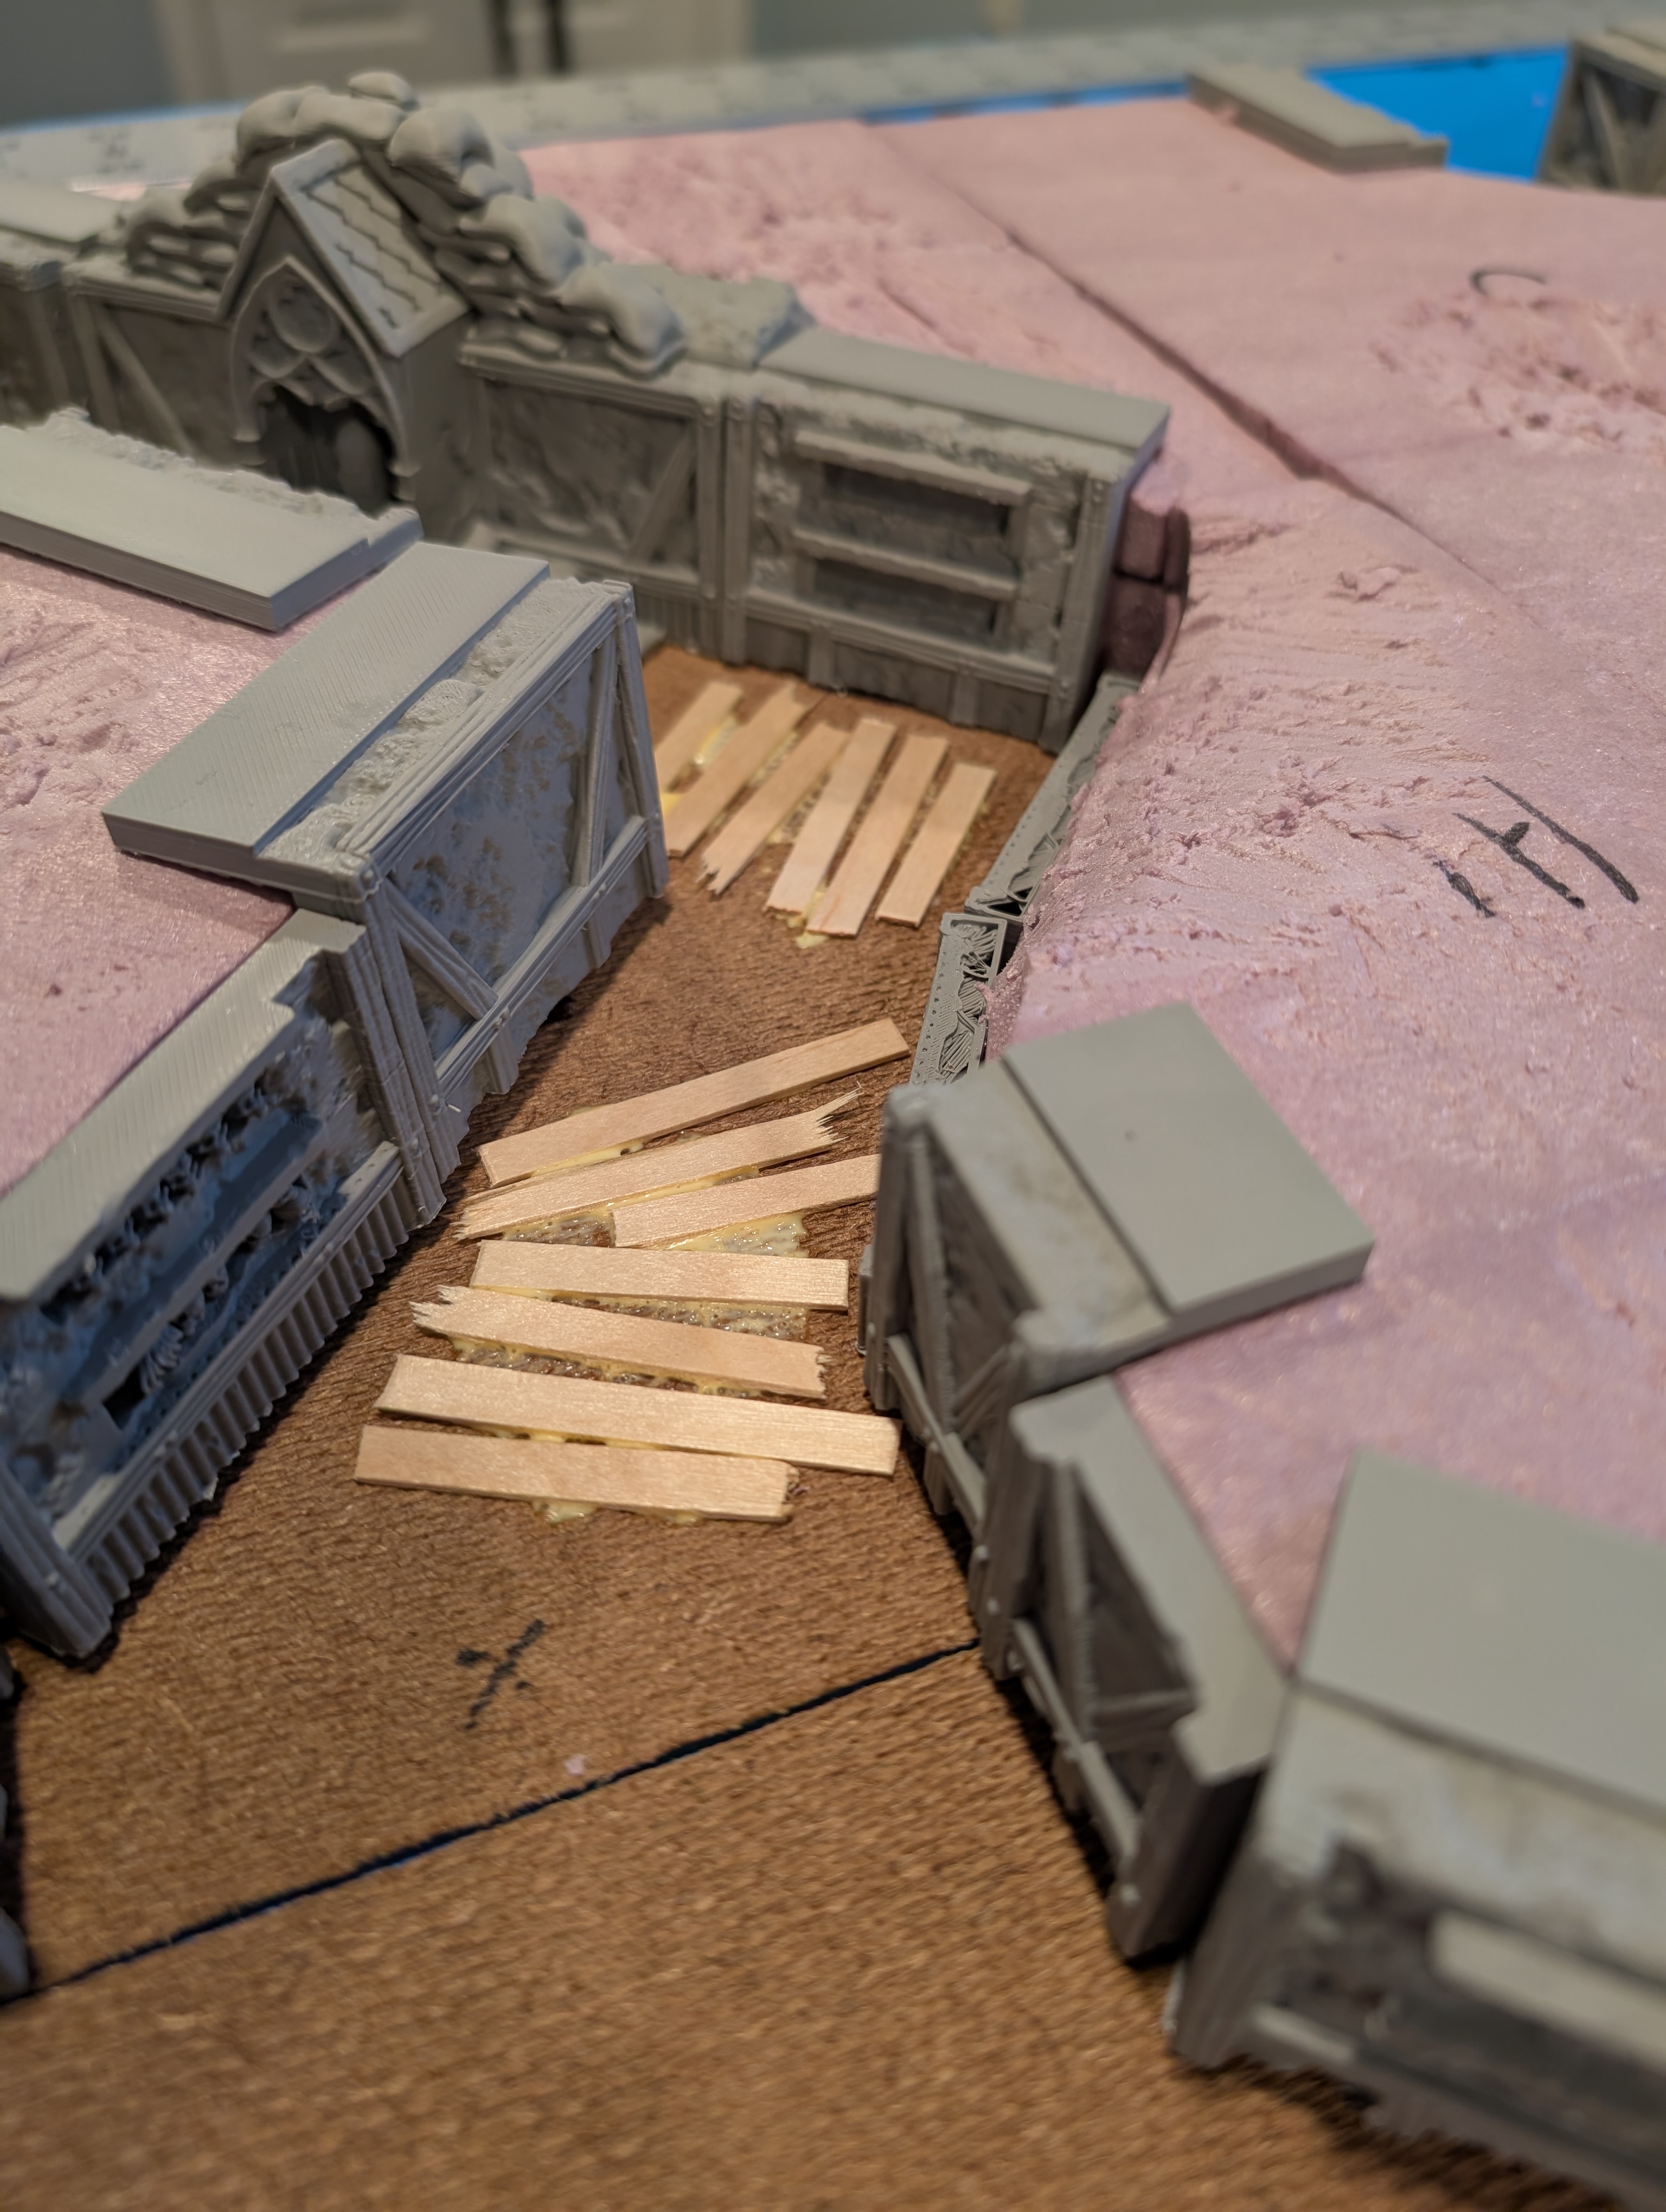
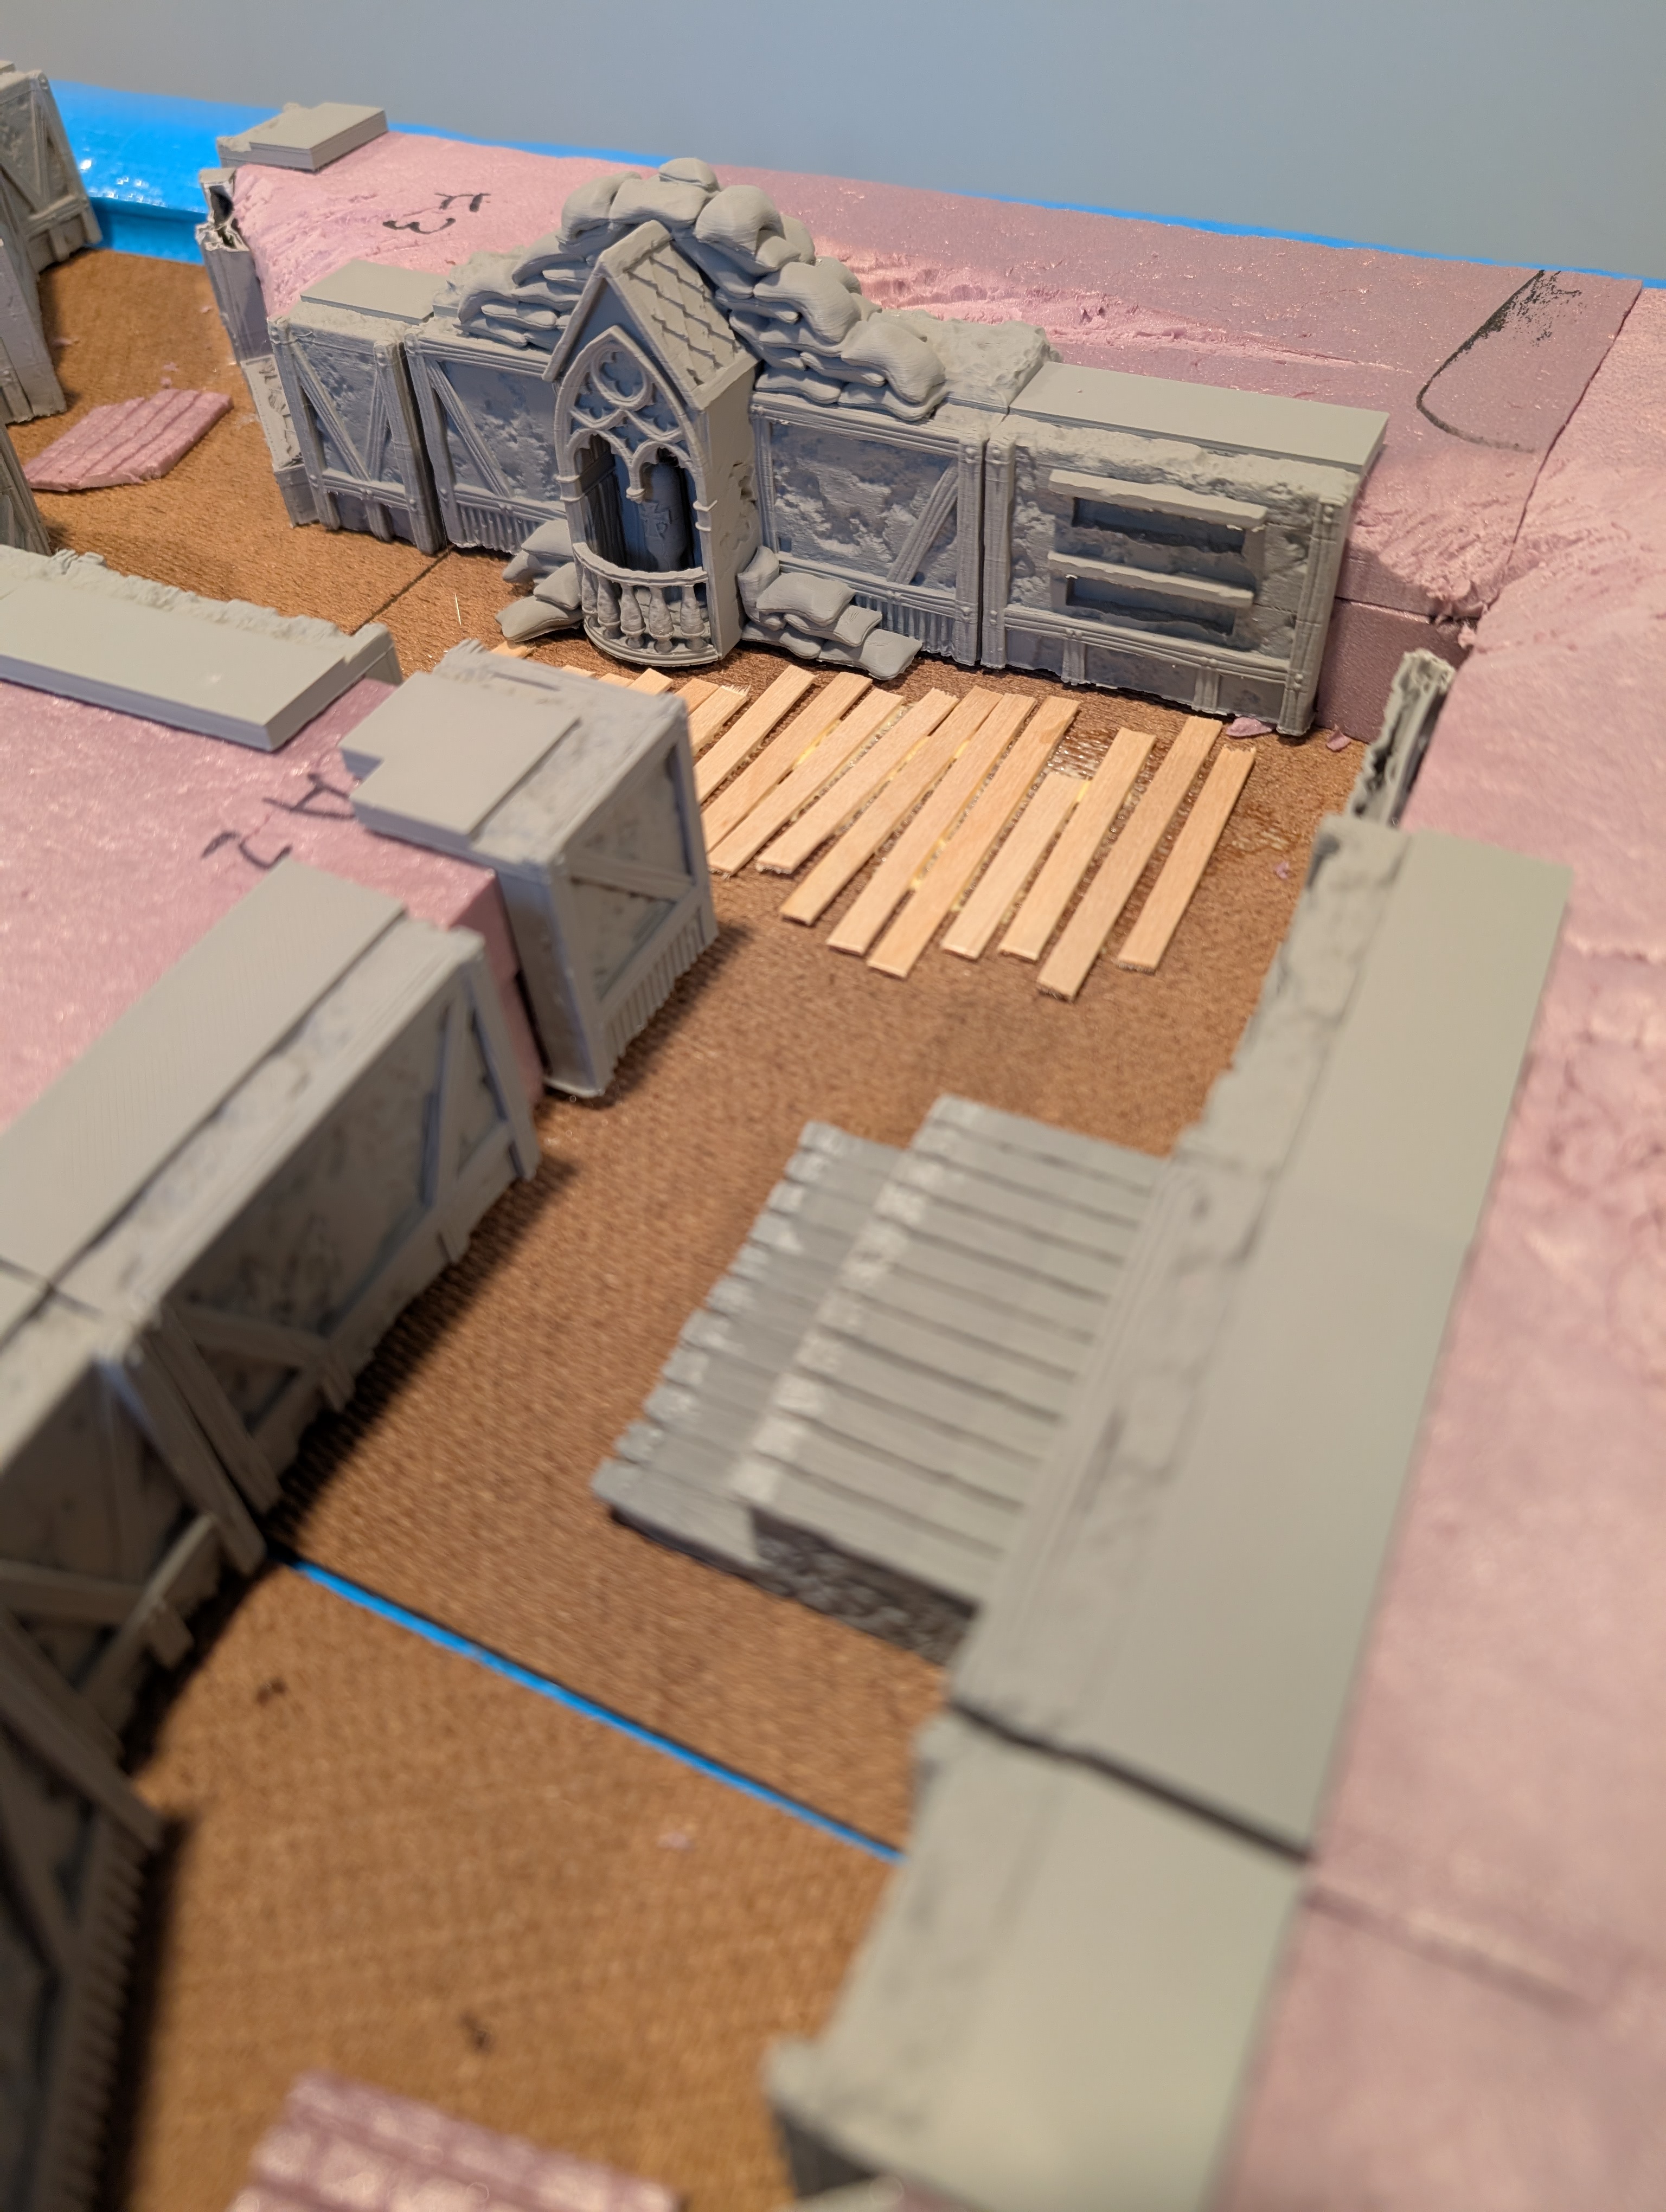
With the foam glued and the walls printed. It was time to dry fit the walls and determine layout and how many more walls were needed. I quickly realized I was going to need more walls… A few days later and I had enough walls to start gluing them to the foam. In hindsight, I should’ve painted the walls first. It is going to be a pain in the a** to get paint in all these nooks and crannies. I also took this opportunity to add duck boards and bricks to break up the dirt flooring and add some extra elements to the walls.


Stay tuned…
I started this project on October 25th. Multiple people have asked me if I’m enjoying it. I can honestly say that I am so far. Once painting begins I will probably love it a little less, I don’t like painting. I am a very lazy painter but since this isn’t for me, I think I’ll try and put some extra effort into this. I felt like I was progressing pretty well but progress stalled due to hosting family, Thanksgiving and personal obligations. Part 2 will be covering the dirt mud mix, larger terrain pieces and magnetic dirt. Hopefully, I can get that written and posted before January🤞

Leave a comment